Diagnose Air Conditioner Problems on Your Own
An air conditioner (AC) is an essential appliance for staying comfortable during hot weather. However, like any other machine, it can encounter issues. Before calling a professional, you might want to diagnose the problem yourself. This can save time, money, and ensure you understand the scope of the issue. Here’s a step-by-step guide to diagnosing common air conditioner problems.
1. Understand the Basics of Your Air Conditioner
To diagnose your AC, you need to understand how it works. A typical air conditioning system consists of:
- Compressor: Pumps refrigerant through the system.
- Condenser Coil: Removes heat from the refrigerant.
- Evaporator Coil: Absorbs heat from your home.
- Blower Fan: Circulates air through the evaporator coil and into your home.
- Thermostat: Controls the temperature and operation of the system.
Knowing these components helps you identify where the problem might be occurring. Let’s explore the steps to diagnose your AC issues.
2. Check the Thermostat
The thermostat is the first point to inspect. If your AC isn’t turning on or cooling properly, ensure the thermostat is set to “cool” mode. Adjust the temperature to a few degrees lower than the current room temperature and see if the system starts. If it doesn’t, replace the thermostat batteries or ensure it’s receiving power.
A faulty thermostat can cause inconsistent cooling or prevent the AC from turning on altogether. If replacing batteries doesn’t help, the thermostat itself might be defective.
3. Inspect the Power Supply
If your AC won’t turn on, check the power supply. Start by ensuring the unit is plugged in properly. Then, inspect the circuit breaker box. A tripped breaker could indicate a power surge or overload. Reset the breaker and try turning on the AC again.
For window AC units, inspect the power cord for damage. If you see frayed wires or burns, the cord may need replacement.
4. Examine the Air Filter
Dirty or clogged air filters are a common cause of AC problems. A blocked filter restricts airflow, making it harder for the unit to cool your space efficiently. This can lead to frozen evaporator coils or uneven cooling.
Remove the filter and hold it up to the light. If you can’t see through it, it’s time to clean or replace it. Filters should be replaced every one to three months, depending on usage and the environment.
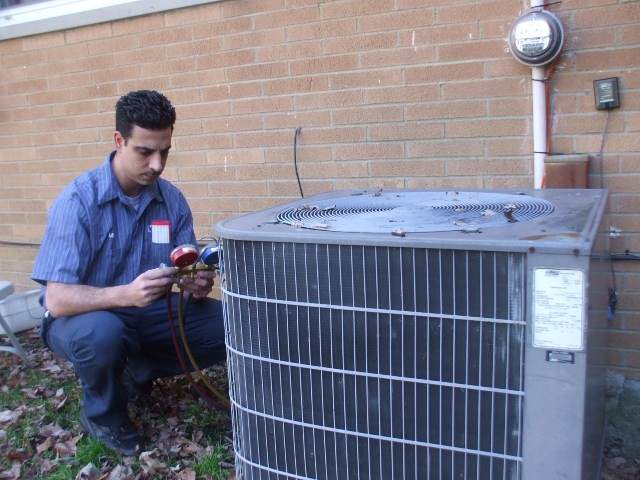
5. Inspect the Outdoor Unit
The outdoor condenser unit plays a crucial role in the cooling process. Debris like leaves, dirt, or grass can obstruct airflow and reduce efficiency.
Turn off the power to your AC and inspect the unit. Clear away any debris and clean the fins with a soft brush or a garden hose. Be careful not to bend the fins, as this can further restrict airflow.
6. Check for Ice on the Evaporator Coils
Ice buildup on the evaporator coils is a sign of poor airflow or low refrigerant levels. Turn off the AC and let the ice melt completely. Inspect the air filter and ensure all vents are open and unblocked.
If the problem persists, low refrigerant levels could be the culprit. In this case, a professional technician may need to recharge the refrigerant or repair leaks.
7. Listen for Unusual Noises
Strange noises often indicate mechanical problems.
- Hissing or bubbling sounds: Could point to a refrigerant leak.
- Squealing or grinding noises: May signal issues with the blower motor or fan.
- Banging or rattling sounds: Often caused by loose or broken components.
By identifying the type of noise, you can narrow down the issue and explain it to a technician if needed.
8. Check the Drain Line
The AC drain line removes condensation from the unit. If this line becomes clogged, it can cause water to back up into your home or trigger a system shutdown.
Locate the drain line, usually a small PVC pipe, and inspect it for blockages. Use a wet/dry vacuum or a stiff wire to clear the clog. Pour a small amount of vinegar into the line periodically to prevent future clogs.
9. Inspect the Refrigerant Levels
Low refrigerant levels can prevent your AC from cooling effectively. If you suspect this is the issue, look for signs such as:
- Warm air blowing from vents.
- Ice on the evaporator coils.
- Long cooling cycles.
Refrigerant issues typically require professional handling, as they involve sealed components and special tools.
10. Test the Blower Fan
The blower fan circulates air throughout your home. If it’s not functioning correctly, you may experience weak airflow or no air at all. Turn off the system and inspect the fan for visible damage or debris.
If the fan blades are bent or the motor isn’t working, you might need to replace the component. In some cases, a faulty capacitor could also prevent the fan from running.
11. Check for Leaks
Water pooling around your indoor or outdoor unit can indicate a problem with the drain pan, drain line, or refrigerant system. Inspect these areas for visible leaks and clean up any water to prevent mold or damage.
12. Inspect the Ductwork
For central air systems, leaky or damaged ductwork can reduce efficiency and cooling power. Inspect the ducts for gaps, tears, or disconnected sections. Sealing these leaks with duct tape or mastic can restore proper airflow.
13. Ensure Proper Sizing and Placement
If your AC struggles to cool your space, it might be too small for the room. Alternatively, a unit that’s too large can cycle on and off frequently, reducing efficiency and causing uneven cooling.
Ensuring your air conditioner is appropriately sized for your space is crucial for optimal performance and energy efficiency. Additionally, the placement of the outdoor unit is equally important; it should have adequate clearance on all sides to allow proper airflow. For residents seeking professional guidance, Canberra aircon servicing can provide expert advice and maintenance to keep your system running efficiently and effectively.
14. Test the System After Each Step
After addressing each potential issue, test your AC to see if it’s functioning correctly. This process of elimination helps pinpoint the problem and ensures you don’t overlook any issues.
When to Call a Professional
While many AC problems can be diagnosed and addressed on your own, some issues require professional expertise. Call a technician if:
- You detect a refrigerant leak.
- The compressor or motor is malfunctioning.
- Electrical issues persist despite resetting breakers or checking connections.
- The problem remains unresolved after trying the above steps.
Conclusion
Diagnosing air conditioner problems on your own can be empowering and cost-effective. By following these steps, you can identify common issues, potentially fix minor problems, and know when to seek professional help. Regular maintenance, such as cleaning filters and inspecting the outdoor unit, can also prevent many issues from occurring in the first place.
Taking the time to understand and care for your AC ensures it continues to keep your home comfortable for years to come.